Musio Studio manualChapter 9
Mixing and mastering
Set levels and pans, send tracks to the song's reverb and effect buses, use Studio's effects, and master the song to a loudness target.
On this page
Musio instruments’ own built-in reverbs and effects are off in Musio Studio. Studio’s effects and the song’s reverb take their place.
The Track Panel
The Track Panel sits beside any page and shows the selected track. Open or close it with Cmd+JCtrl+J.
- Sound: Choose sound, Open in Sounds, and Update when a newer version is ready. For a stand-in, it says which instrument the part was written for, with Swap in or Get.
- Record-enable, M (mute), S (solo) and Open, which opens the full Instrument page.
- Articulations: each one with its keyswitch. One that isn’t loaded yet says so; click it to load it.
- Mics and Input.
- Track: Dynamics, Level (double-click for 0 dB), Pan (double-click for center) and Reverb (double-click for 25%).
- Delay: plays the track up to 100 ms later (+) or earlier (−). See Timing.
- Send: how much of the track goes to an effect bus.
- Effects: Add effect. Click an effect to open it; right-click it to bypass or remove it.
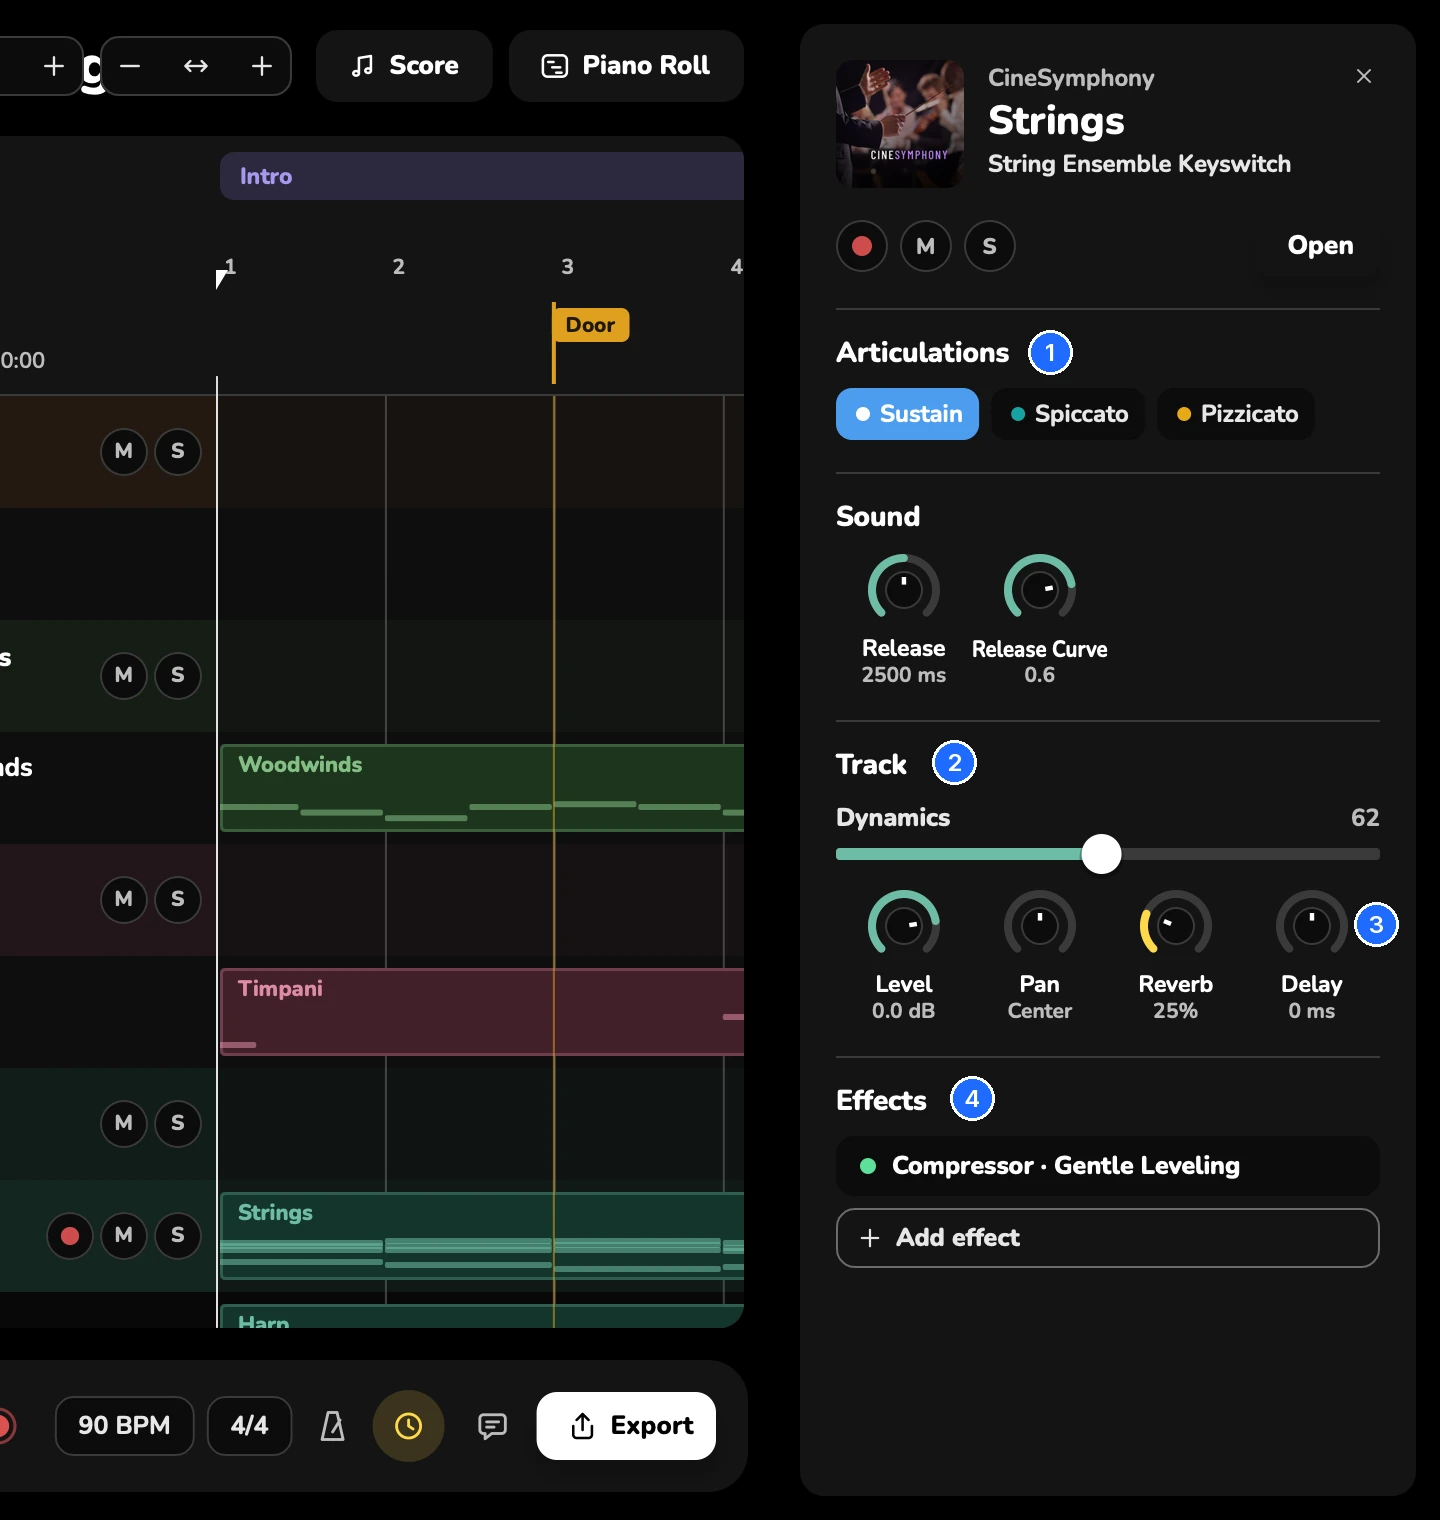
- Articulations
- Track: Dynamics, Level, Pan, Reverb
- Delay
- Effects
The Mix page
Mix (4) has a strip for every track: M, S, the arm button, its sound, its Reverb send, its sends to effect buses, Pan and Level, with meters. Folders have strips of their own, and so do effect buses, the song’s reverb and the master.
- Reset levels sets every track to 0 dB, in the center.
- Select several tracks to move their faders and pans together.
- Undo covers fader moves, mutes and solos.
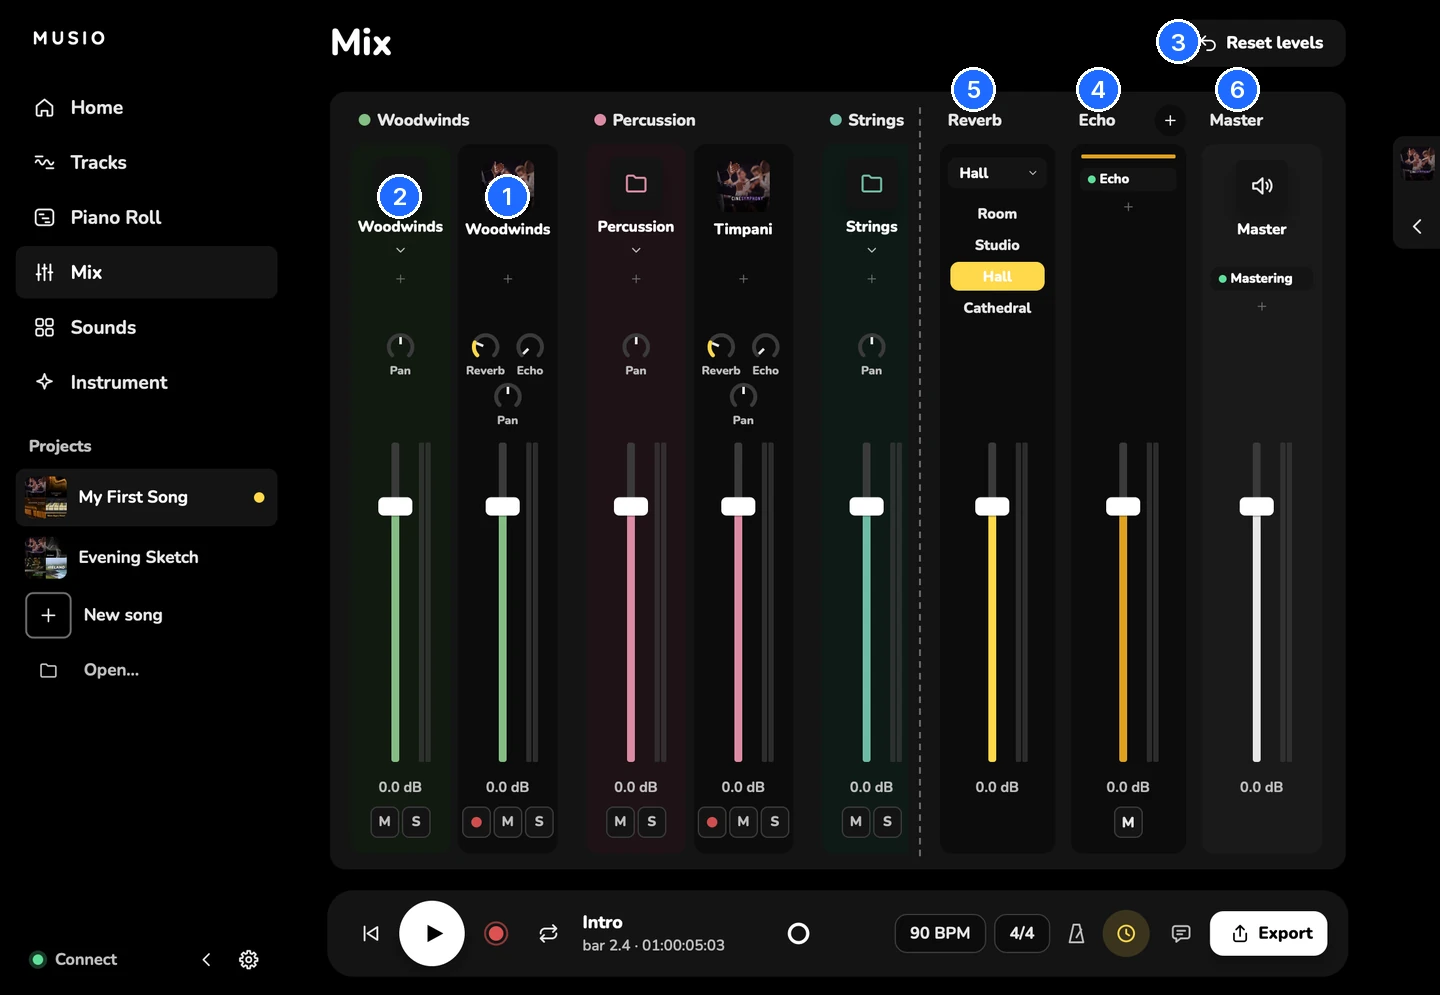
- Track strips
- A folder’s strip
- Reset levels
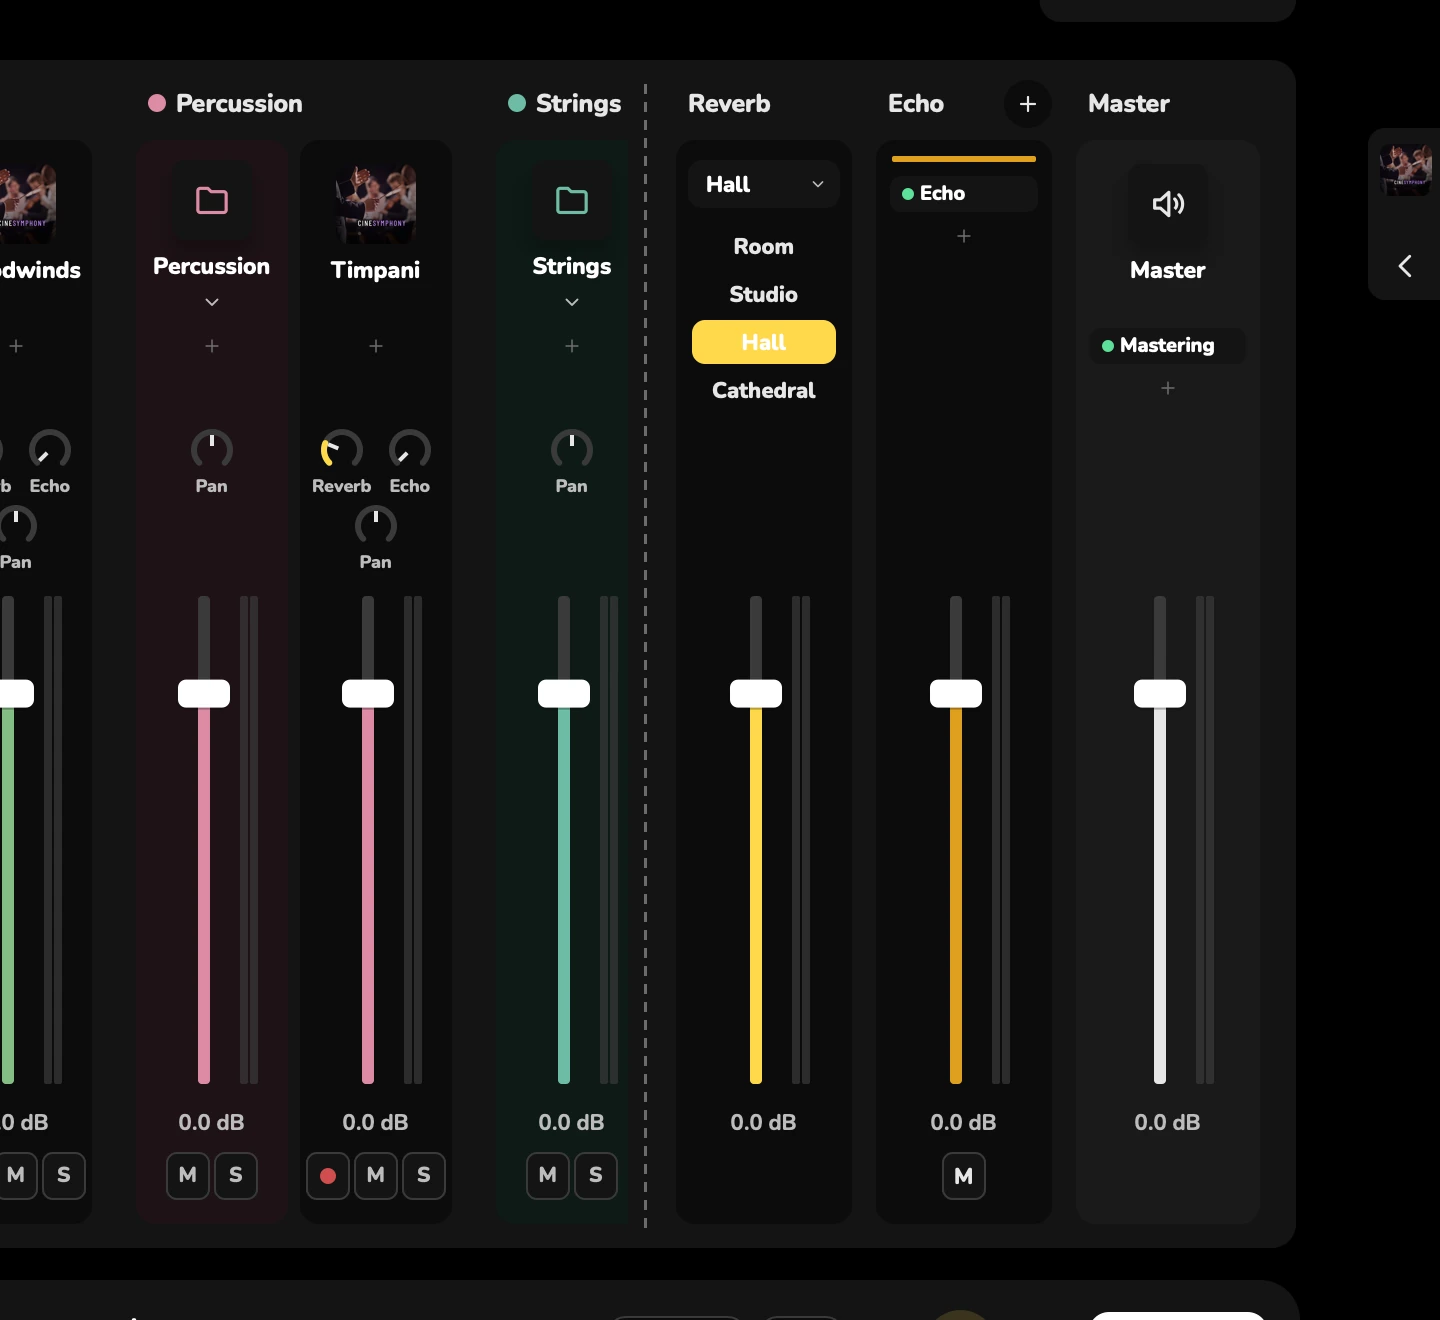
- Effect bus (Echo)
- Song reverb
- Master
The song’s reverb
Every song has one shared reverb: a room (Room, Studio, Hall or Cathedral) and a level. Each track’s Reverb knob sets how much of it goes there.
Set the room and its level on the reverb’s strip in Mix.
Effect buses and sends
An effect bus is a strip with its own effects and level. Tracks send some of their sound to it, and its effect comes back into the mix.
- Every song has an Echo bus.
- To add one, choose Add effect bus in Mix. You can rename it or remove it.
- To send a track to a bus, use its send in Mix, or Send in the Track Panel.
The meters on the song’s reverb and on each bus show what comes back from them.
Add an effect
Tracks, folders, effect buses and the master each have effect slots.
- Click Add effect in a slot, in Mix or in the Track Panel.
- Choose an effect:
- on a track, folder or effect bus: Reverb, Echo, Filter, Drive, Chorus, EQ, Compressor or De-esser;
- on the master: the same, plus Limiter and Mastering.
- The effect’s window opens. Pick a preset with Previous preset and Next preset, or set its controls.
The Limiter and Mastering go last on the master, after its fader, and only one of them at a time: adding one replaces the other.
- Click an effect’s slot to open it again. Right-click it to bypass or remove it.
- Each effect shows a live picture of what it’s doing to the sound. Its window stays open while you play. Click its slot again, or press Esc, to close it.
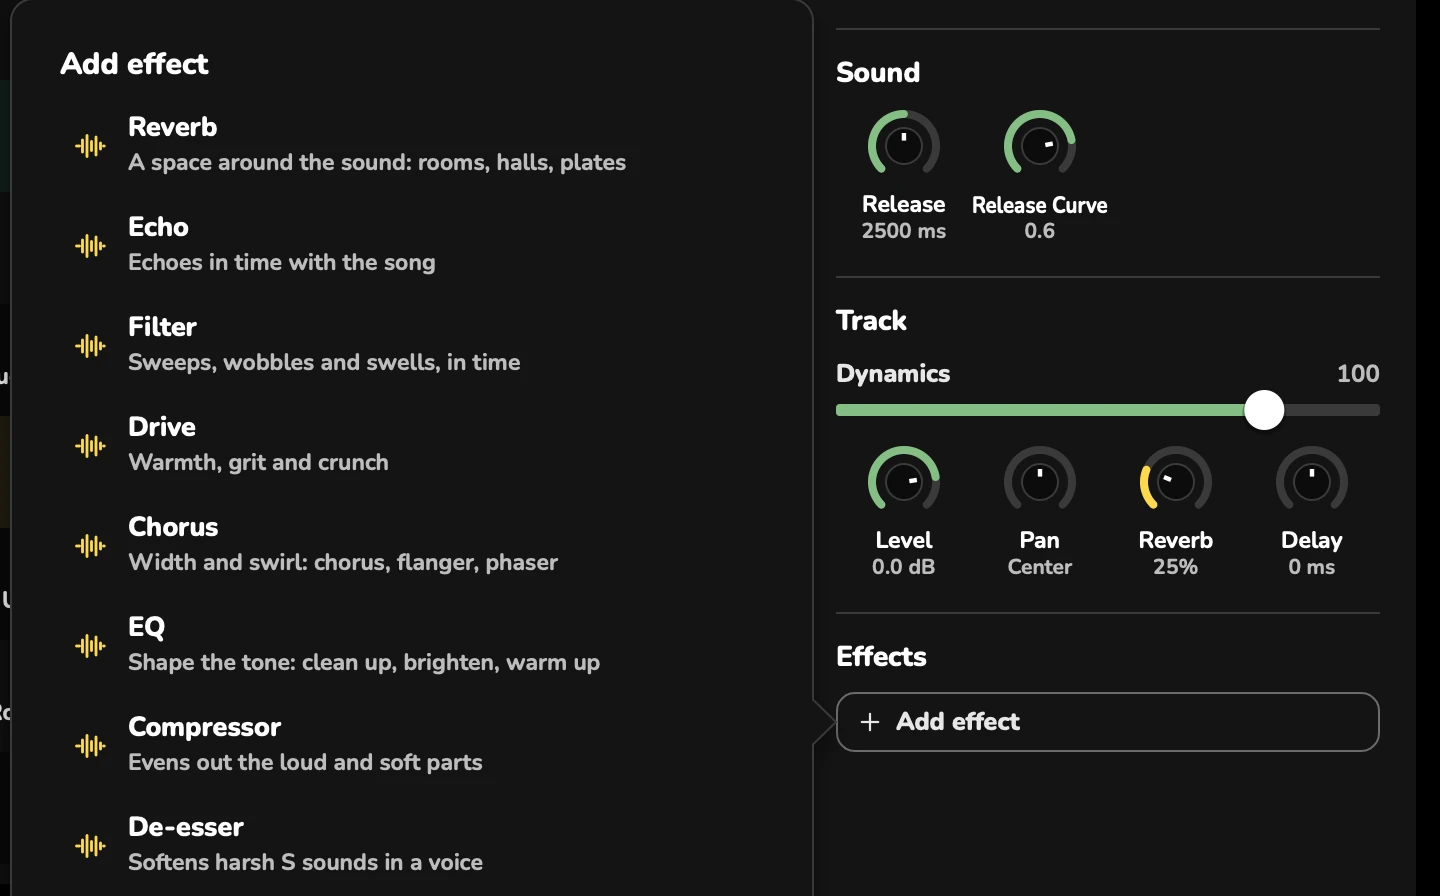
Effects
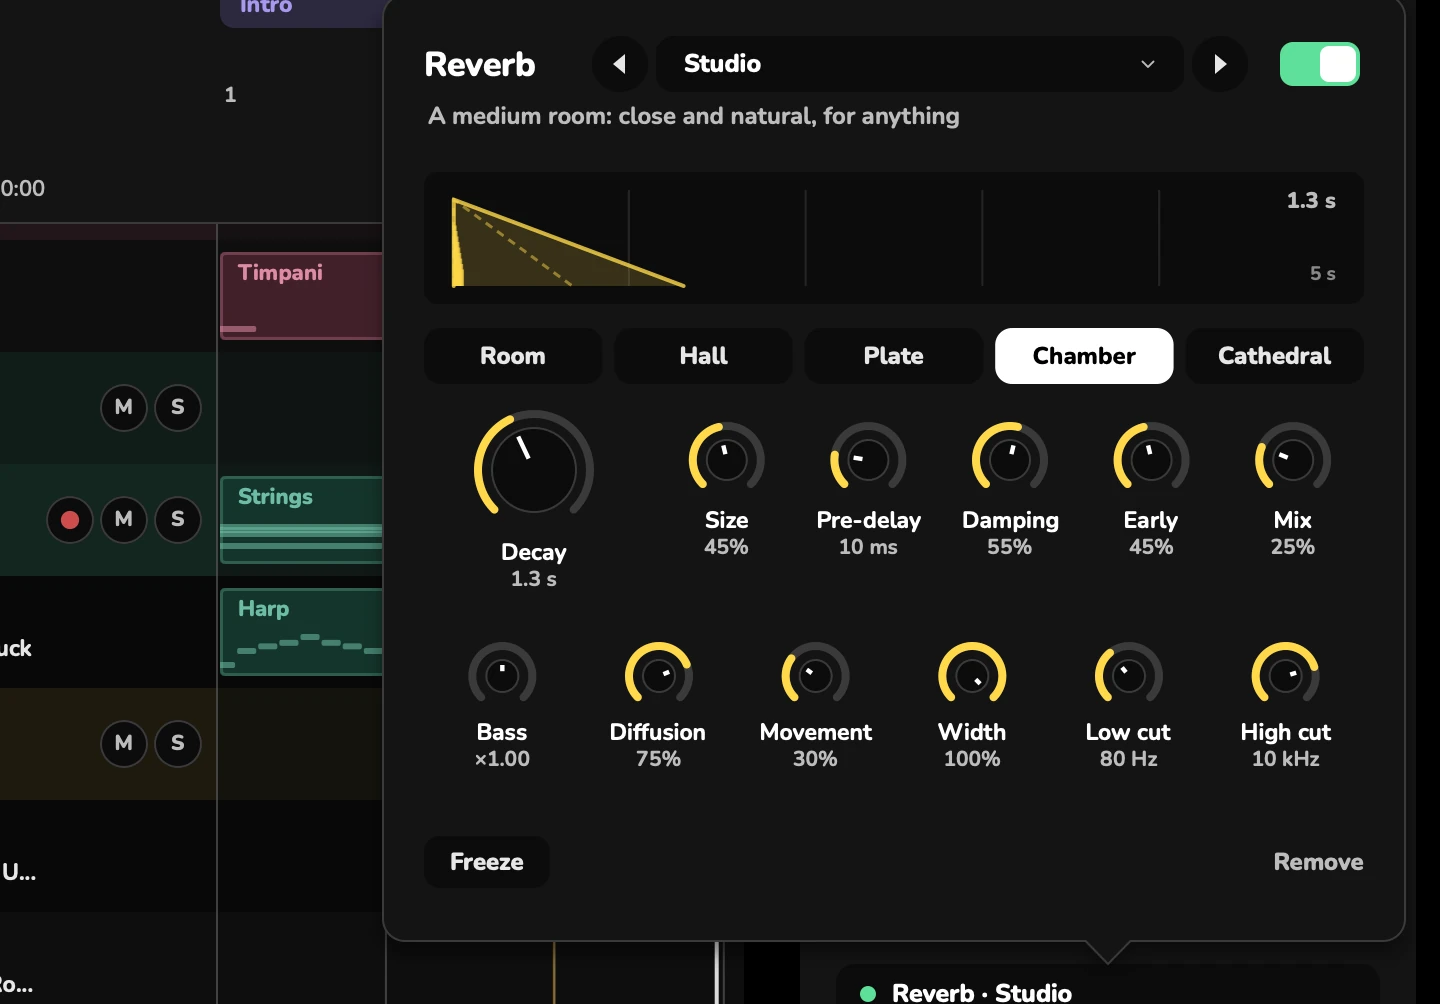
Reverb
Types: Room, Hall, Plate, Chamber and Cathedral. Controls: Decay, Size, Pre-delay, Damping, Early, Mix, Bass, Diffusion, Movement, Width, Low cut, High cut and Freeze.
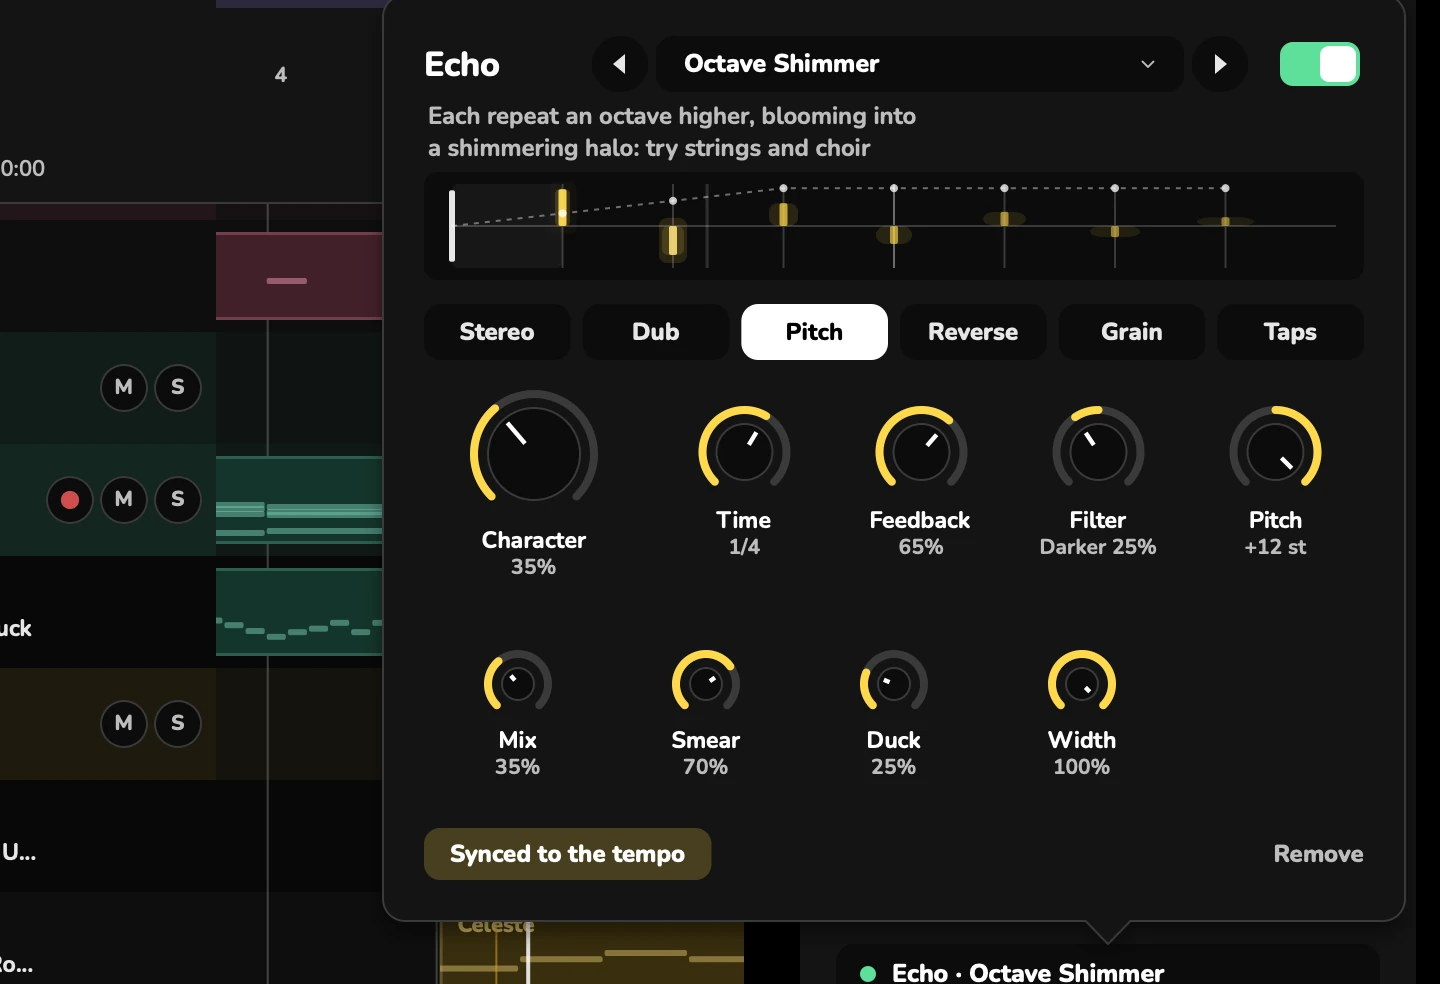
Echo
Types: Stereo, Dub, Pitch, Reverse, Grain and Taps (Dotted, Triplets or Gallop). Controls: Character, Time (in time with the song, or free), Feedback, Filter, Pitch, Mix, Smear, Duck, Width and Freeze.
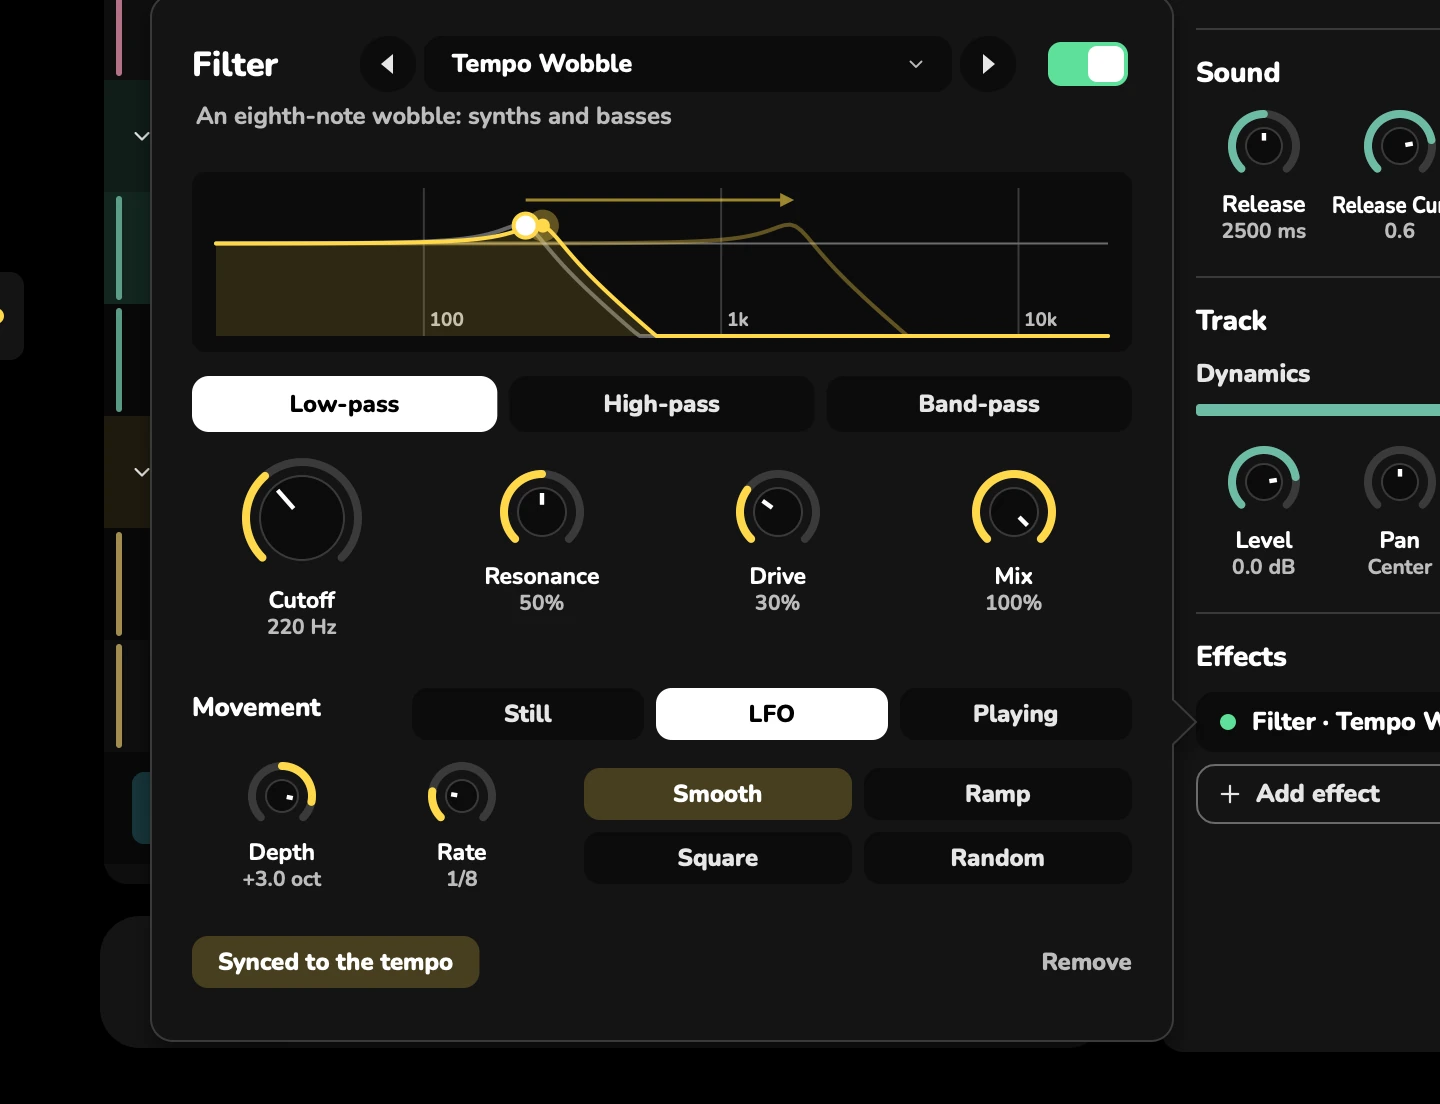
Filter
Types: Low-pass, High-pass and Band-pass. It can stay Still, move with an LFO (Smooth, Ramp, Square or Random), or open as you’re Playing. Controls: Cutoff, Resonance, Drive, Mix, Depth and Rate.
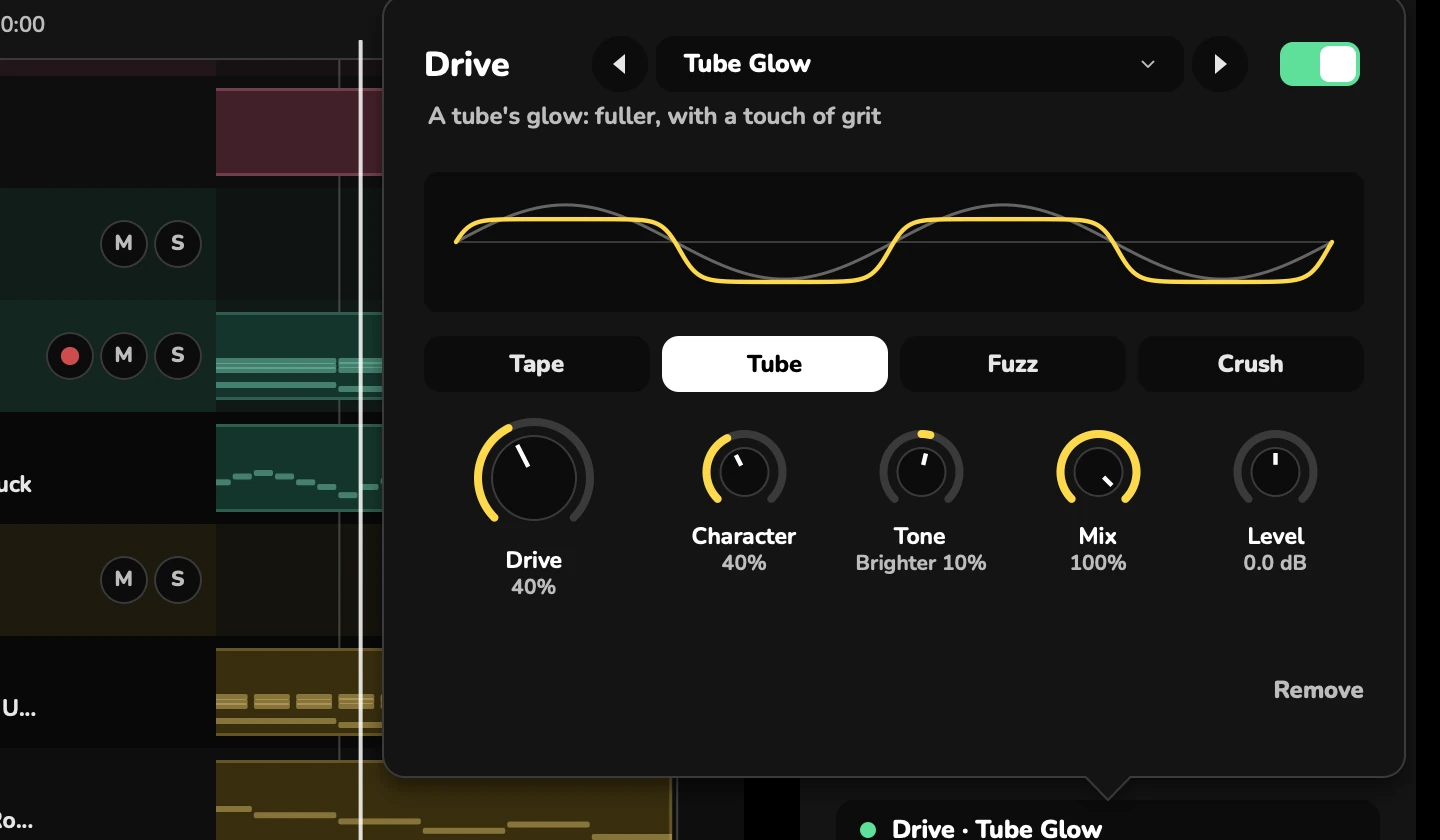
Drive
Types: Tape, Tube, Fuzz and Crush. Controls: Drive, Tone, Mix, Level, Crush and Rate.
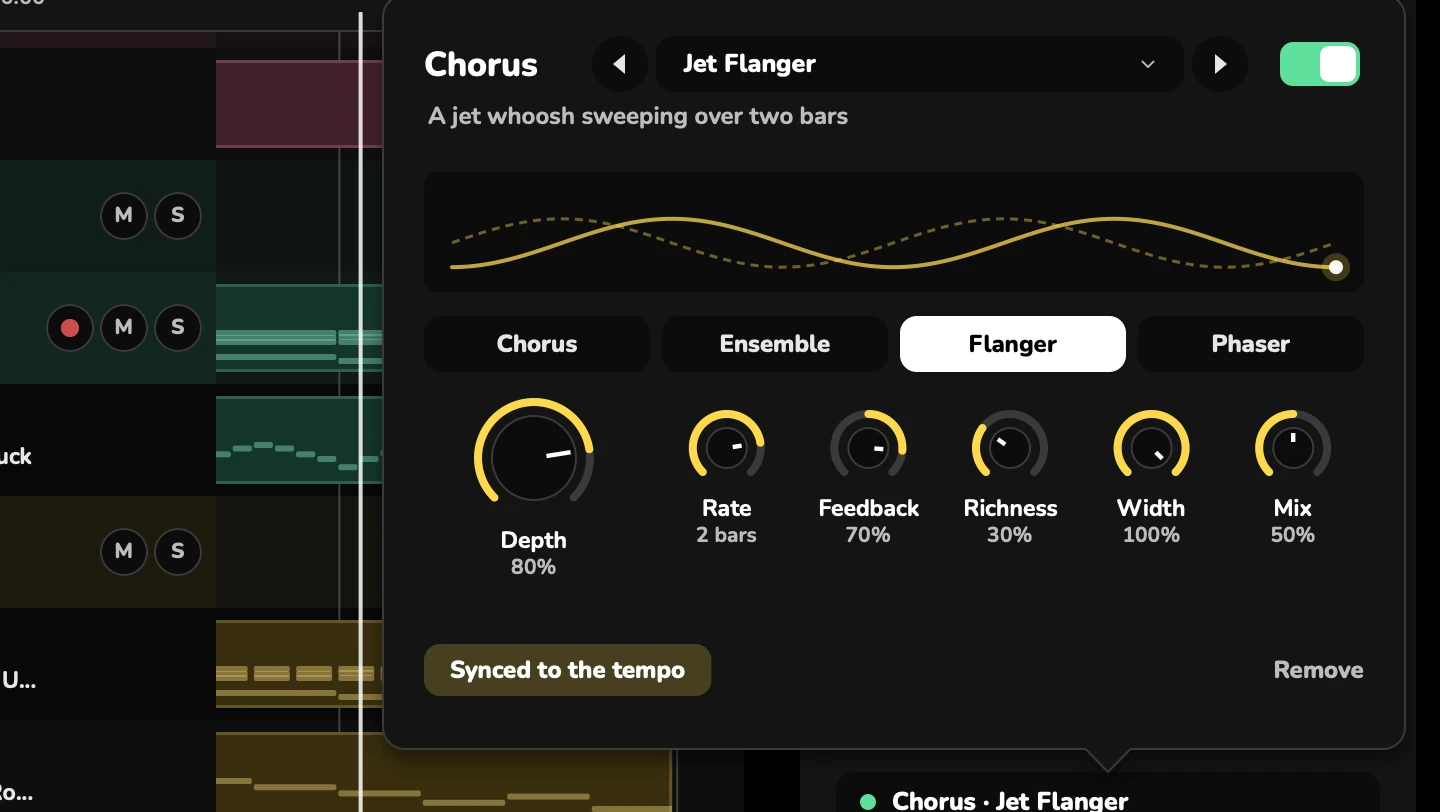
Chorus
Types: Chorus, Ensemble, Flanger and Phaser. Controls: Rate, Depth, Feedback, Richness, Width and Mix.
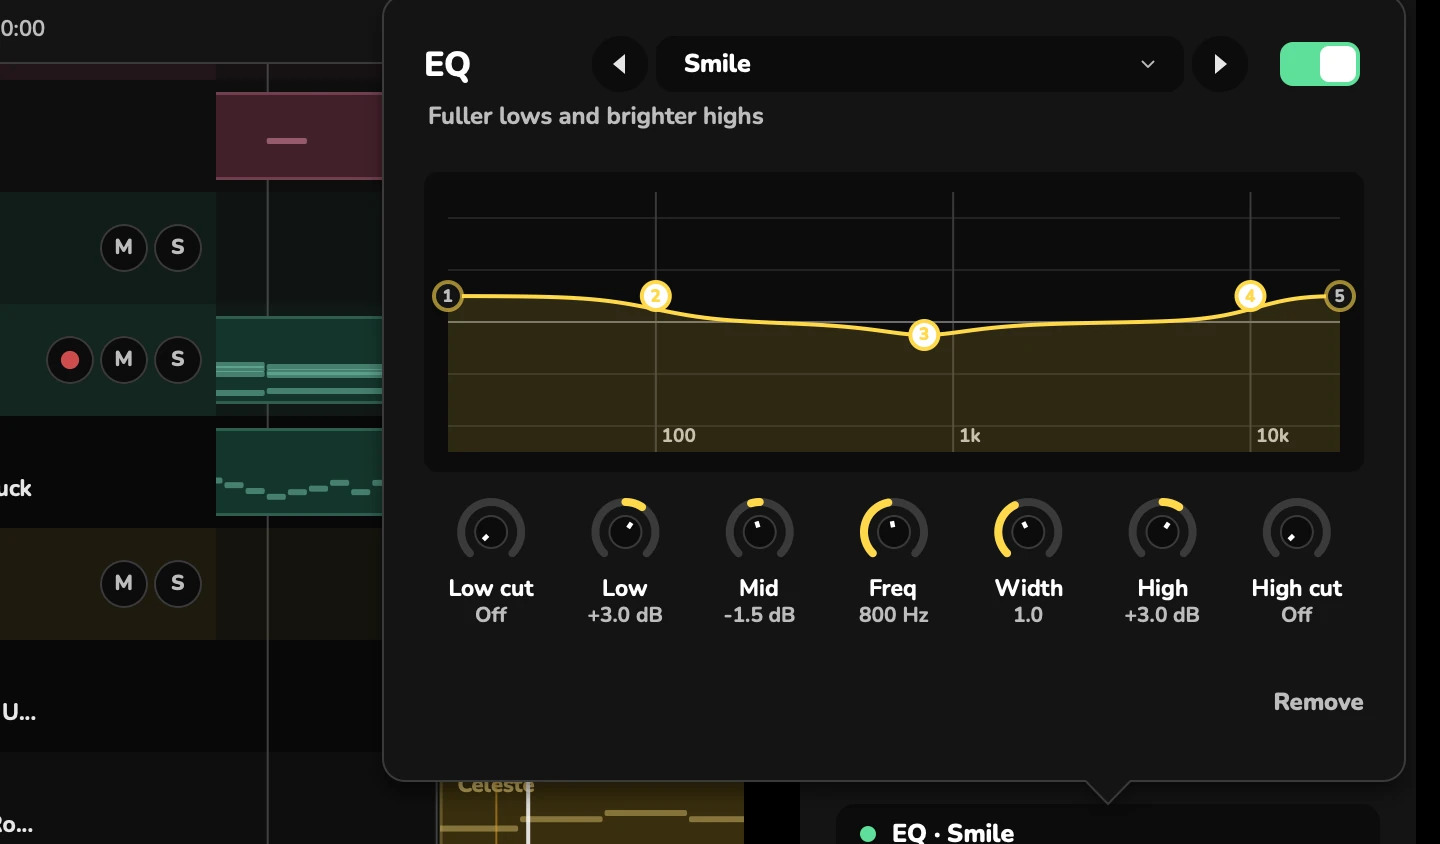
EQ
Low cut, Low, Mid (with Freq and Width), High and High cut.
Compressor and De-esser
The Compressor and De-esser are in every Add effect list.
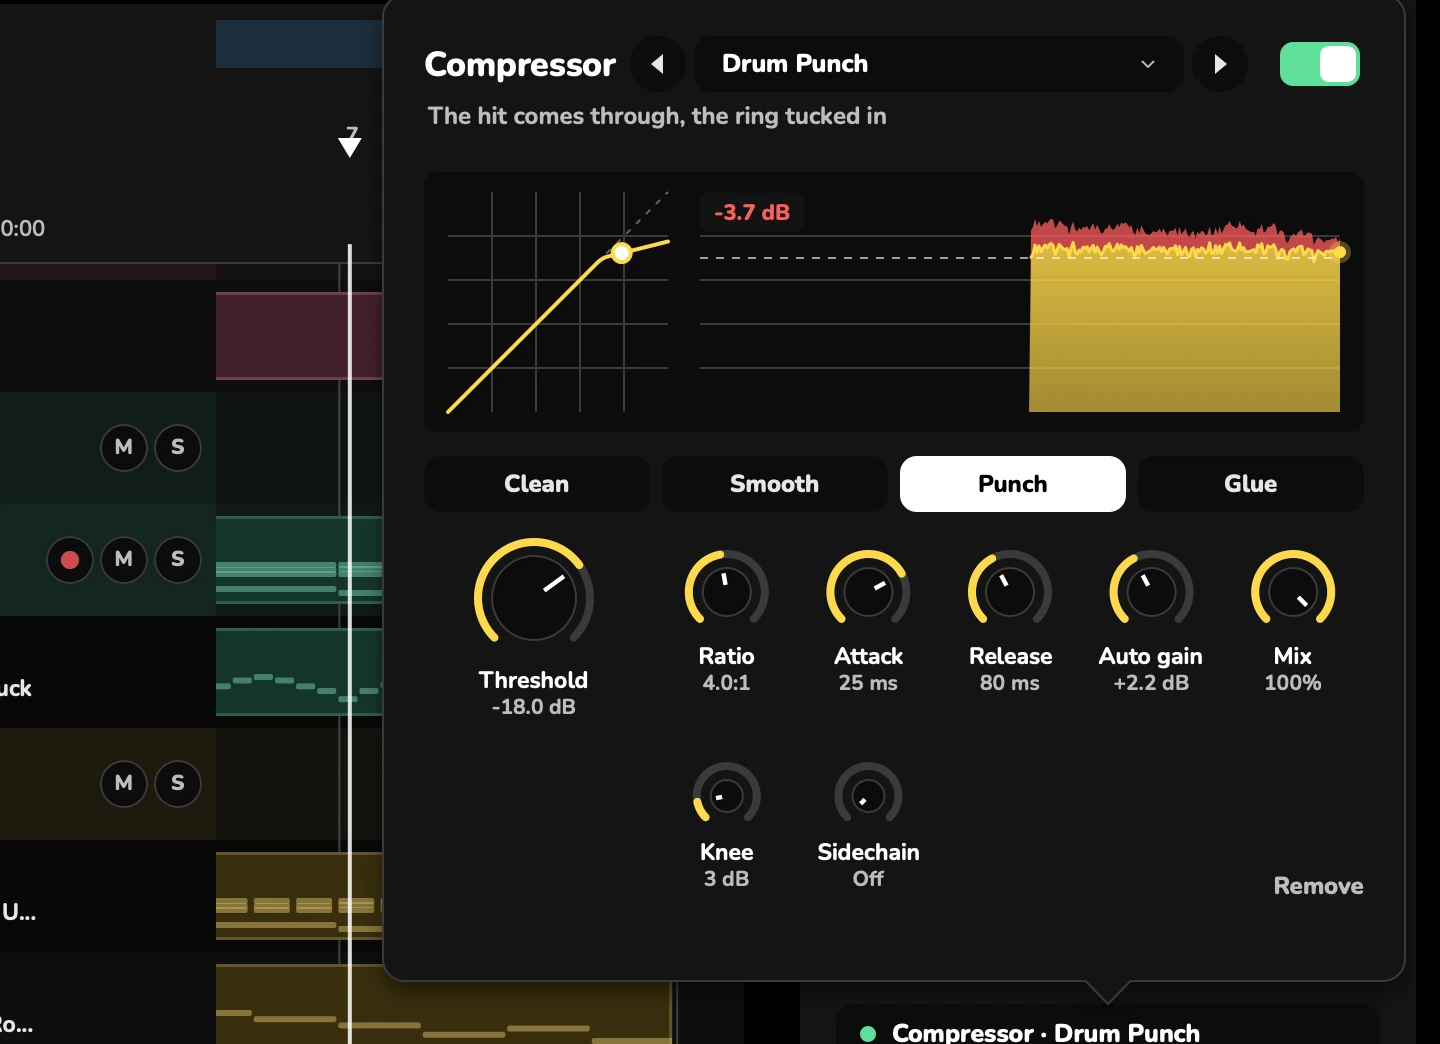
The Compressor evens out loudness. Styles: Clean, Smooth, Punch and Glue. Controls: Threshold, Ratio, Attack, Release (Auto avoids pumping), Knee, Gain (Auto gain keeps it about as loud), Mix and Sidechain. Drag its curve to set the threshold and ratio.
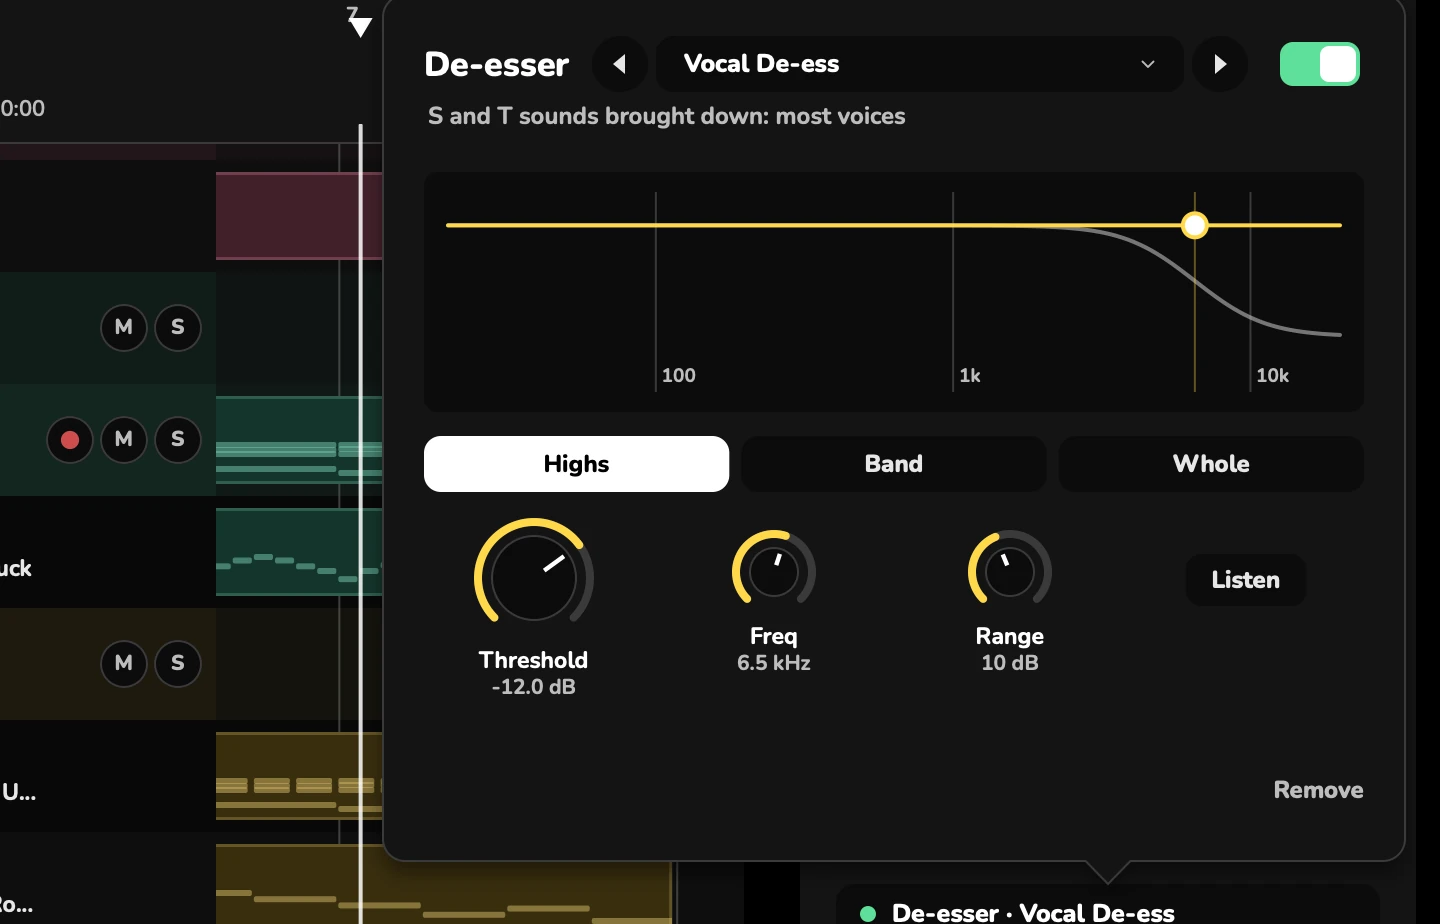
The De-esser tames “s” sounds. Modes: Highs, Band and Whole. Controls: Threshold, Freq and Range. Listen plays only what it reacts to.
The Compressor and De-esser add no delay, so they’re fine on a track you’re recording.
Mastering
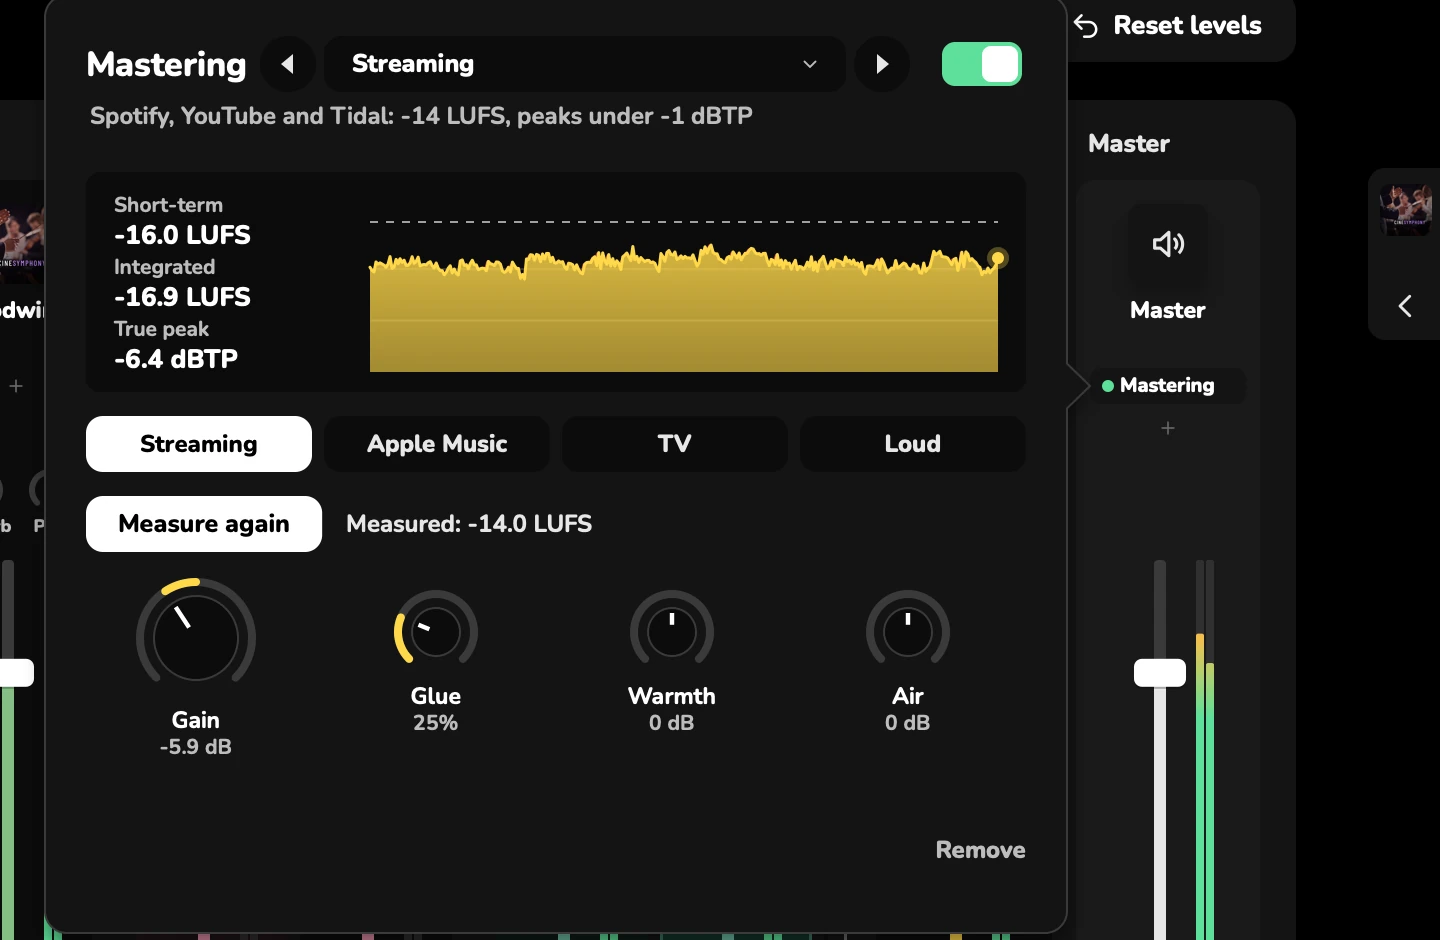
Mastering on the master sets the song’s loudness for where it’s going.
- On the master, choose Add effect > Mastering.
- Choose a target.
- Choose Measure the song. Studio measures the song, then sets Gain to reach the target.
- After you change the mix, choose Measure again.
| Target | Loudness | For |
|---|---|---|
| Streaming | −14 LUFS, peaks under −1 dBTP | Spotify, YouTube and Tidal |
| Apple Music | −16 LUFS | Apple Music |
| TV | −24 LUFS, peaks under −2 dBTP | Broadcast |
| Loud | −10 LUFS | Trailers and games |
Glue, Warmth (below 150 Hz) and Air (above 10 kHz) add gentle polish.
Limiter and loudness
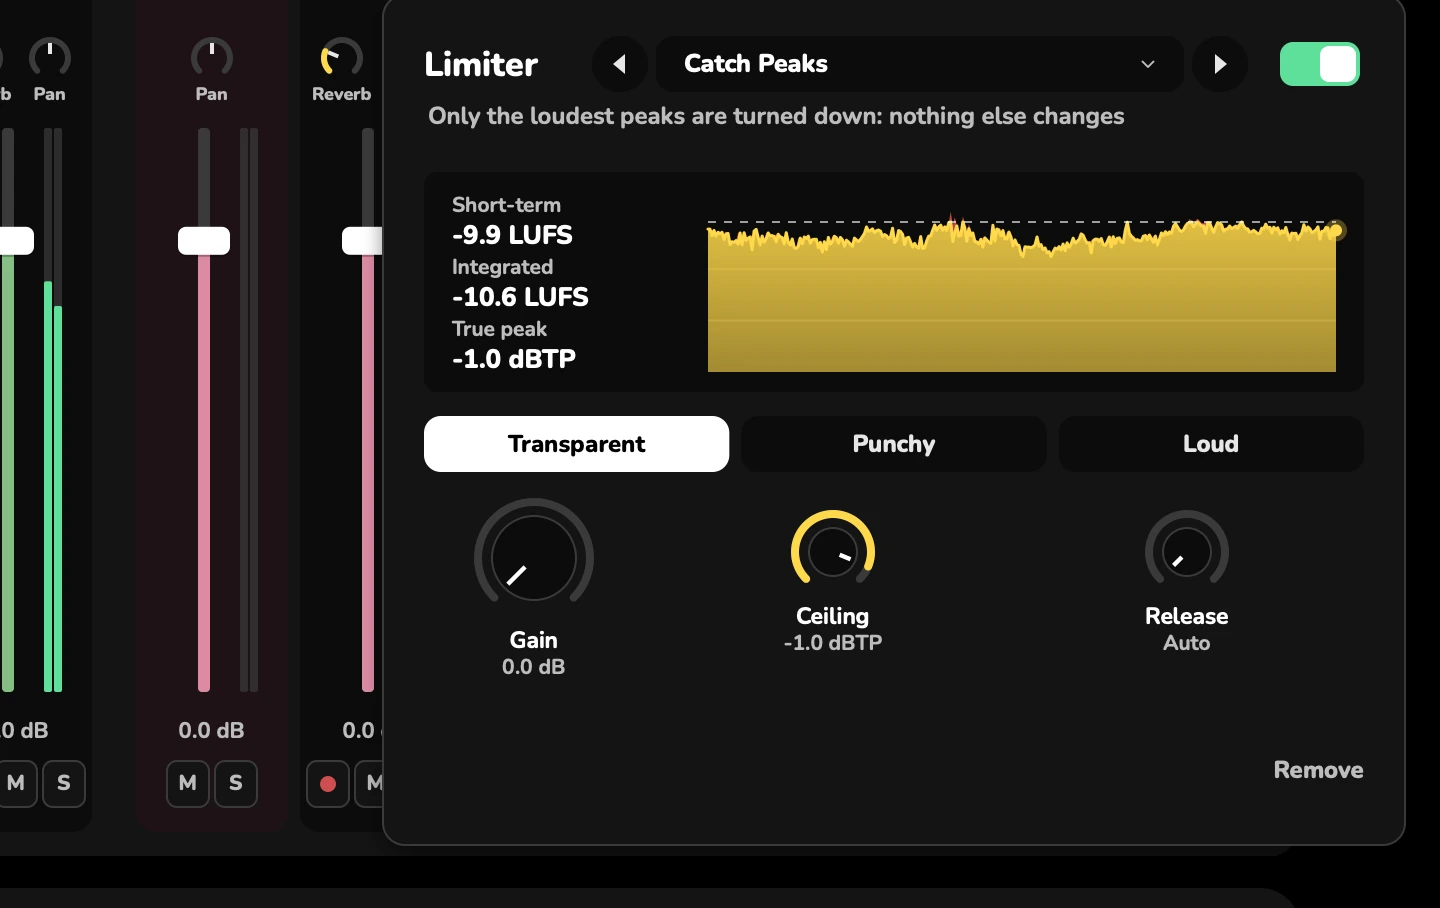
The Limiter is on the master only (Add effect > Limiter). It keeps everything under its ceiling, without pumping or distorting. Styles: Transparent, Punchy and Loud, with presets such as Catch Peaks and Broadcast Safe. Controls: Gain, Ceiling and Release.
Its loudness meter shows the song’s Short-term and Integrated loudness and its True peak.
Every WAV or MP3 export reports its loudness, for example Exported Song.wav: −14.2 LUFS, −1.0 dBTP.